hoover repair manual
Welcome to the Hoover Repair Manual, your comprehensive guide for maintaining and fixing Hoover appliances. This manual provides essential safety tips, maintenance advice, and troubleshooting solutions to ensure your Hoover equipment runs efficiently and lasts longer. By following the instructions, you can perform repairs confidently, saving time and money. Always use genuine Hoover parts for optimal performance and reliability.
1.1 Importance of the Repair Manual
The Hoover Repair Manual is an essential resource for ensuring the longevity and optimal performance of your appliance. It provides critical safety guidelines to prevent accidents and damage during repairs. By following the manual, you can identify and resolve common issues efficiently, avoiding further complications. Regular maintenance, as outlined, extends the lifespan of your Hoover product. The manual also emphasizes the use of genuine parts, ensuring reliability and performance. Whether you’re a novice or an experienced user, this guide empowers you to handle repairs confidently, saving time and money. Always refer to the manual before starting any repair to guarantee safety and effectiveness.
1.2 Safety Precautions Before Starting Repairs
Before initiating any repairs on your Hoover appliance, it is crucial to follow safety precautions to avoid accidents and ensure a successful repair process. Always unplug the device from the power source to prevent electrical shocks or injuries. Avoid using the appliance on wet surfaces or outdoors, as this can lead to malfunction or safety hazards. Ensure the cleaner is only used for domestic cleaning purposes, as described in the user guide. Regularly inspect and maintain the appliance to prevent wear and tear. For stairs, position the cleaner above you to maintain control. Never use the appliance for wet pickup or on wet surfaces. Always refer to the manual for specific safety guidelines tailored to your Hoover model.

Understanding the Hoover Repair Manual
The Hoover Repair Manual is a detailed guide offering step-by-step instructions, diagrams, and parts lists to help users diagnose and fix issues efficiently. It ensures safe and effective repairs.
2.1 Structure and Content of the Manual
The Hoover Repair Manual is organized into clear sections, starting with an introduction, followed by safety precautions, troubleshooting guides, and detailed repair procedures. Each section is designed to address specific aspects of maintenance and repair, ensuring users can easily navigate and find relevant information. The manual includes diagrams, part lists, and step-by-step instructions to help users identify and resolve common issues. Additionally, it emphasizes the importance of using genuine Hoover parts for optimal performance and longevity. This structured approach makes the manual accessible to both novice and experienced users, providing a comprehensive resource for all repair needs.
2.2 How to Navigate the Manual Effectively
To navigate the Hoover Repair Manual efficiently, start by reviewing the table of contents to locate relevant sections quickly. Use the index to find specific topics or components. Digital versions often include a search function, allowing you to type keywords for instant access. Refer to diagrams and illustrations for visual guidance when disassembling or reassembling parts. Always begin with the safety precautions and troubleshooting sections before attempting repairs. For complex issues, cross-reference the parts list to ensure you have the correct tools and components. Familiarize yourself with the manual’s structure to streamline your repair process and minimize downtime.

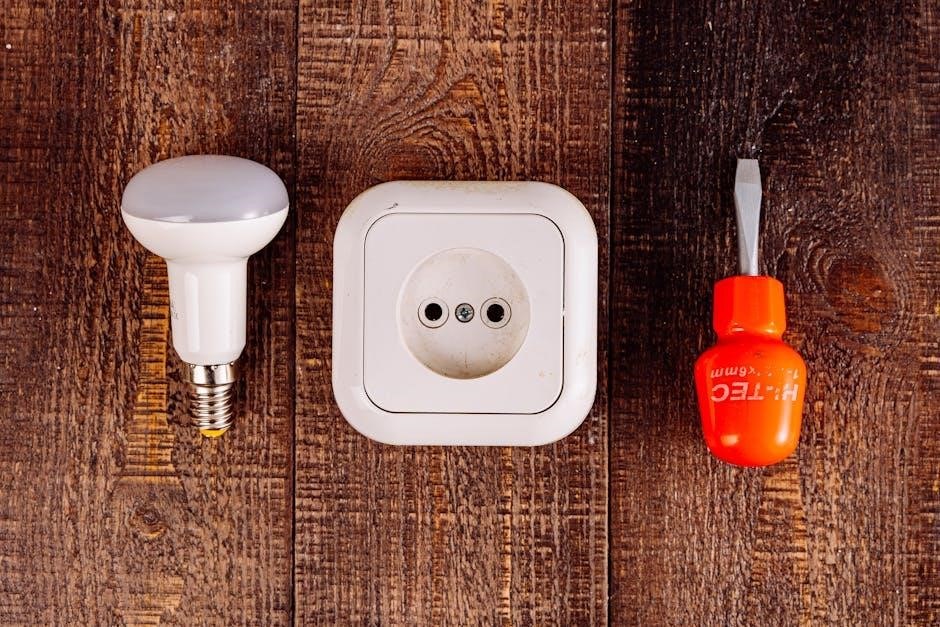
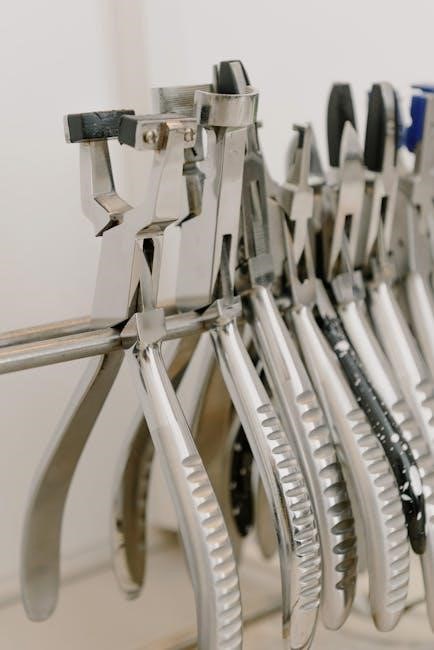
Essential Tools and Equipment for Hoover Repairs
Essential tools include screwdrivers, pliers, wrenches, and Torx drivers. Specialized tools like circuit testers are needed for advanced repairs. Source tools from authorized Hoover dealers.
3.1 Basic Tools Required for Repairs
The basic tools needed for Hoover repairs include screwdrivers (both flathead and Phillips), pliers, wrenches, and Torx drivers. Additional essentials are Allen keys, a multimeter for electrical checks, and a work light for visibility. Always use tools suitable for the specific task to avoid damaging components. A soft brush can help clean internal parts, while gloves protect your hands. Ensure all tools are in good condition to prevent slipping or stripping screws. For advanced repairs, specialized tools like circuit testers may be required. These tools are widely available at hardware stores or authorized Hoover dealers. Proper tools ensure efficient and safe repairs.
3.2 Specialized Tools for Advanced Repairs
Advanced Hoover repairs may require specialized tools such as a belt replacement kit, motor testing multimeter, and circuit board diagnostic tools. A vacuum gauge can measure suction power accurately, while a brush motor tester ensures proper electrical function. For deep cleaning or internal repairs, a flexible inspection scope may be needed. Specialized screwdrivers, like a Torx or hex key, are often necessary for accessing internal components. These tools are typically available at authorized Hoover service centers or online retailers. Always use genuine Hoover parts and tools to ensure compatibility and safety. Proper use of specialized tools prevents further damage and guarantees effective repairs. Regularly update your toolkit to handle evolving repair needs.
Common Issues and Their Solutions
This section addresses frequent issues such as motor malfunction, belt wear, suction loss, and blockages, providing clear solutions to restore your Hoover’s optimal performance quickly and effectively.
4.1 Motor Malfunction

A motor malfunction in your Hoover vacuum can be identified by unusual noises, reduced performance, or complete shutdown. Common causes include overheating, overloading, or worn-out internal components. To address this, first, unplug the vacuum and allow it to cool down. Check for blockages in the airway or dustbag, as these can strain the motor. Inspect the belt for wear or damage, as a faulty belt can put additional stress on the motor. If the issue persists, consult the manual for guidance on replacing the motor or internal parts. Always use genuine Hoover spares to ensure compatibility and longevity. Regular maintenance, such as cleaning filters and lubricating moving parts, can prevent future motor issues. If unsure, contact a professional for assistance.
4.2 Belt Wear and Tear
Belt wear and tear is a common issue in Hoover vacuums, often causing reduced suction or complete loss of cleaning functionality. Signs include cracks, fraying, or a broken belt. To address this, turn off and unplug the vacuum. Locate the belt, usually found near the brush roll, and inspect for damage. Replace the belt with a genuine Hoover part, such as model HR-1028 or HR-1805, depending on your vacuum model. Ensure proper alignment during installation to avoid further wear. Regularly checking and replacing the belt can prevent damage to other components. Refer to the manual for specific instructions, and always use authentic parts for optimal performance and longevity.
4.3 Suction Power Loss
Suction power loss in Hoover vacuums can occur due to blockages, dirty filters, or worn-out internal components. Start by inspecting the hose and wand for obstructions. Remove any debris or kinks that restrict airflow. Next, check the filters and clean or replace them as needed. A clogged pre-filter or HEPA filter can significantly reduce suction. Additionally, ensure the dustbag is empty or replaced if full. If issues persist, inspect the vacuum’s internal parts for damage or misalignment. Refer to the troubleshooting guide in the manual for specific steps. Regular maintenance, such as cleaning filters and replacing belts, can help prevent suction loss and maintain optimal performance. Always use genuine Hoover parts for replacements to ensure reliability.
4.4 Blockages in the Vacuum System

Blockages in the vacuum system are a common issue that can significantly reduce performance. Start by checking the hose, wand, and crevice tool for visible obstructions. Remove any debris or hair tangles that restrict airflow. Next, inspect the dustbin or bag for overfilling, as this can impede suction. Clean or replace the filters, as dirty filters can cause blockages. If the issue persists, examine the internal components, such as the motor duct or cyclone, for buildup or damage. Use a soft brush or cloth to remove dust and debris. Regularly cleaning and maintaining these areas can prevent blockages. Refer to the manual for specific guidance on disassembling and cleaning internal parts. Always ensure all components are securely reassembled after cleaning to maintain proper function.

Step-by-Step Repair Guide
This section provides a detailed, step-by-step approach to repairing your Hoover appliance, from preparation and disassembly to diagnosing issues, replacing parts, and reassembling. Always use genuine Hoover parts and follow safety guidelines to ensure successful repairs and maintain performance. Testing post-repair is essential.
5.1 Preparing the Vacuum for Repair
Before starting repairs, ensure the vacuum is unplugged from the power source to avoid accidents. Gather all necessary tools and genuine Hoover parts as specified in the manual. Clear a clean, flat workspace to prevent losing small components. Refer to the manual’s assembly schematic for a visual guide. Empty the dustbag or dustbin and remove any filters to inspect for blockages. Lubricate moving parts if needed, but avoid over-lubrication. If unsure, consult the troubleshooting guide or contact Hoover support. Always handle internal components with care to prevent further damage. Taking photos during disassembly can aid in reassembly. Ensure all steps align with safety guidelines provided in the manual.
5.2 Disassembling the Hoover Vacuum
Begin by removing the dustbin or bag and filters to access internal components. Use a screwdriver to remove screws from the bottom plate or side panels, depending on your model. Gently pry open the casing, taking care not to damage clips or hinges. Refer to the manual’s assembly schematic for guidance. Disconnect hoses and belts carefully, noting their connections for reassembly. Remove the motor housing by lifting or sliding it off, as specified. Take photos or notes during disassembly to aid reassembly. Store small parts in a safe place to prevent loss. Avoid forcing parts, as this may cause breakage. Always follow the manual’s disassembly sequence to ensure safety and efficiency.
5.3 Identifying and Diagnosing Faults
After disassembling, inspect each component for visible damage or wear. Check for blockages in hoses, filters, or the vacuum chamber. Look for frayed cords, loose connections, or damaged belts. Test the motor for unusual noises or vibrations. Refer to the troubleshooting guide in the manual to match symptoms with potential issues. Use a multimeter to test electrical components if necessary. Consult the error codes section if your model has digital features. Document your findings to prioritize repairs. Always ensure the vacuum is unplugged before handling internal parts. Prioritize safety and use genuine Hoover parts for reliable fixes.
5.4 Replacing Damaged or Worn-Out Parts
Once faults are identified, replace damaged or worn-out parts with genuine Hoover components. Always unplug the vacuum before starting. Loosen screws carefully and disconnect components as needed. For belts, align the new one with the motor pulley and tension it properly. Replace filters or brushes by following the manual’s instructions. Ensure all electrical connections are secure and test the motor after replacement. Use the part list in the manual to verify correct replacements. Dispose of old parts responsibly. Reassemble the vacuum only after all replacements are complete. Double-check every connection to avoid further issues. Genuine Hoover parts ensure optimal performance and longevity of your appliance.
5.5 Reassembling the Vacuum After Repairs
Reassembling your Hoover vacuum after repairs requires careful attention to detail. Start by reattaching internal components, such as the motor or belts, ensuring they are securely fastened. Replace any covers or housings, aligning them properly to avoid misalignment. Reconnect electrical wires and switches, ensuring they are tightly secured. Use genuine Hoover parts for optimal fit and function. Tighten all screws gradually to maintain balance and prevent damage. Once reassembled, double-check all connections and test the vacuum on a low setting. Ensure no dust or debris is trapped during reassembly. Properly aligning parts and avoiding forced fits will prevent further damage. Regular cleaning of filters and checking for blockages will help maintain performance. Always refer to the manual for specific reassembly instructions tailored to your model.
5.6 Testing the Vacuum Post-Repair
After completing the repairs, thoroughly test your Hoover vacuum to ensure it functions correctly. Begin by plugging in the vacuum and turning it on at a low setting. Check for unusual noises, vibrations, or leaks. Test the suction power by picking up small debris like dust or paper. Ensure all features, such as adjustable settings or attachments, work as intended. Inspect for any air leaks or loose connections. If you replaced belts or filters, verify they are properly aligned and secure. Avoid overloading the vacuum during the test. If it performs well, gradually increase the workload. Always refer to the manual for specific testing guidelines. Proper testing ensures safety and confirms the repairs were successful.

Maintenance Tips to Prevent Future Issues
Regular maintenance is key to extending your Hoover vacuum’s lifespan. Clean filters, empty dustbags, and lubricate moving parts to ensure optimal performance. Schedule periodic belt replacements and inspect for blockages to avoid suction loss. Follow these tips to prevent common issues and maintain efficiency. Consistent upkeep saves time and prevents costly repairs. Always use genuine Hoover parts for reliability. Proper care ensures your vacuum operates effectively, providing consistent cleaning results. Regular checks prevent unexpected malfunctions, keeping your home clean with minimal effort. Maintain your Hoover well to enjoy years of reliable service. Keep your appliance in top condition by following these simple maintenance routines.
6.1 Regular Cleaning of Filters
Regular cleaning of filters is crucial for maintaining your Hoover vacuum’s performance. Dirty filters can reduce suction power and strain the motor, leading to potential damage. Depending on usage, clean or replace filters every 1-3 months. For washable filters, remove them, tap off loose dust, and wash with mild soap. Allow them to dry completely before reinstalling to prevent mold growth. If your Hoover has a HEPA filter, check if it’s washable or needs replacement. Always use genuine Hoover parts to ensure compatibility and efficiency. Cleaning filters not only improves airflow but also enhances cleaning results. Regular maintenance prevents clogs and extends the lifespan of your vacuum. Keep your filters in top condition for optimal performance.
6.2 Checking and Replacing Belts Periodically
Regularly inspecting and replacing belts is essential for maintaining your Hoover vacuum’s efficiency. Over time, belts can wear out, crack, or break, leading to reduced performance or complete malfunction. Check belts every 3-6 months or when you notice a decrease in suction power. Look for signs of wear, such as cracks or fraying. If damaged, replace the belt immediately to prevent further damage to the motor or other components. Always use genuine Hoover replacement belts to ensure proper fit and functionality. Turn off and unplug the vacuum before performing any belt maintenance. Refer to your manual for specific instructions on how to access and replace the belt. Regular belt checks can prevent unexpected breakdowns and keep your vacuum running smoothly.
6.3 Emptying and Cleaning the Dustbag
Regularly emptying and cleaning the dustbag is crucial for maintaining your Hoover vacuum’s performance. Empty the dustbag after each use or when it reaches 2/3 of its capacity to ensure optimal suction power. To empty it, turn off the vacuum, press the release button, and carefully dispose of the contents. For bagless models, tap the dustbin gently to remove any stubborn debris. Avoid washing the dustbag, as moisture can damage the material. Instead, clean it with a soft brush or cloth. Replace the dustbag if it becomes torn or damaged. Regular maintenance prevents dust buildup, reduces allergens, and ensures your vacuum operates efficiently. Always use genuine Hoover parts for consistent performance and longevity.
6.4 Lubricating Moving Parts
Lubricating moving parts is essential to ensure smooth operation and extend the life of your Hoover vacuum. Apply a small amount of silicone-based lubricant to components like wheels, axles, and hinges. Avoid over-lubrication, as excess can attract dust and dirt. Regular lubrication reduces friction, preventing wear and tear on critical mechanisms. Always use high-quality, vacuum-safe products to maintain performance. Lubricate every 3-6 months or when you notice increased noise or resistance. This simple maintenance step helps keep your Hoover running efficiently and prolongs its lifespan.

Troubleshooting Guide
This section helps identify and resolve common issues with your Hoover appliance. Use the manual’s troubleshooting guide to diagnose problems, interpret error codes, and determine repair steps.
7.1 Using the Troubleshooting Section of the Manual
The troubleshooting section of the Hoover Repair Manual is designed to help you identify and resolve common issues efficiently. Start by locating the specific problem your appliance is experiencing, such as error codes or unusual behavior. The manual provides a list of potential issues along with their causes and solutions. For example, if your vacuum has a suction power loss, the manual will guide you to check for blockages or faulty filters. Follow the step-by-step instructions to diagnose and repair the issue. If the problem persists, refer to the manual for guidance on when to contact professional assistance. Always use genuine Hoover parts for repairs to ensure optimal performance and safety.
7.2 Common Error Codes and Their Meanings
The Hoover Repair Manual includes a dedicated section for understanding common error codes that may appear on your appliance. These codes, such as E01, E02, or E03, indicate specific issues like motor malfunctions, sensor problems, or blockages. Each code is accompanied by a detailed explanation, helping you identify the root cause of the problem. For instance, an E01 error might signal a blockage in the vacuum system, while an E02 could indicate a faulty belt. Refer to the manual to match the error code with its meaning and follow the recommended troubleshooting steps. If the issue persists, the manual will guide you on when to contact professional assistance for further support. Always consult the manual before attempting any repairs to ensure accuracy and safety.
7.3 Resetting the Hoover Vacuum
Resetting your Hoover vacuum is a straightforward process that can resolve various operational issues. Start by turning off the appliance and unplugging it from the power source. Check for blockages in the hose, filters, or dustbag, and ensure they are clean or replaced if necessary. If your model has a reset button, typically located near the power switch or on the base, press and hold it for 5-10 seconds until the indicator light flashes. Plug the vacuum back in and turn it on to test if the issue is resolved. Regular resets can help maintain optimal performance and prevent unexpected shutdowns. Always refer to your specific model’s manual for detailed reset instructions.
7.4 When to Contact Professional Assistance
If you encounter issues beyond your DIY capabilities, such as complex electrical faults or severe motor damage, it’s crucial to contact professional assistance. Attempting advanced repairs without expertise can lead to further damage or safety hazards. Always consult the manual for guidance, but if the problem persists, reach out to Hoover’s customer service or authorized service centers. They provide specialized tools and knowledge to ensure repairs are done safely and effectively. Additionally, if you’re unsure about a repair or lack the necessary skills, seeking professional help is the best option to avoid risks and ensure your Hoover appliance operates correctly.

Sourcing Genuine Hoover Parts
Genuine Hoover parts ensure optimal performance and safety. Always purchase from authorized Hoover dealers or the official website to avoid counterfeit products. This guarantees warranty validity and reliability.
8.1 Importance of Using Genuine Parts
Using genuine Hoover parts is crucial for maintaining your appliance’s performance, safety, and durability. Genuine parts are designed to meet exact specifications, ensuring compatibility and reliability. They are built with high-quality materials, reducing the risk of malfunctions and extending the product’s lifespan. Non-genuine parts may void your warranty and pose safety hazards. Always choose authentic components to preserve your Hoover appliance’s efficiency and prevent potential damage. This ensures optimal functionality and maintains the manufacturer’s standards for quality and safety. Genuine parts are the best investment for long-term reliability and performance.
8.2 Where to Buy Genuine Hoover Spares
Genuine Hoover spares can be purchased directly from authorized Hoover dealers, ensuring authenticity and quality. You can also contact Hoover customer service for assistance in locating parts or arranging replacements. Additionally, the official Hoover website often provides a dedicated section for ordering genuine parts, allowing you to search by model number or product code. Local retailers specializing in appliance parts may also carry Hoover spares. Always verify the seller’s authenticity to avoid counterfeit products. For convenience, many parts are available online, with detailed product descriptions and compatibility information. This ensures you receive the correct components for your specific Hoover model, maintaining performance and warranty validity.
8;3 How to Identify Genuine Hoover Parts
Genuine Hoover parts are stamped with the official Hoover logo and part number, ensuring authenticity. Always check for the Hoover branding and verify the packaging for any signs of tampering. Each part comes with a unique serial number, which can be cross-referenced with Hoover’s official database. Compare the product with the manual or website description to ensure accuracy. Avoid parts with unclear labeling or mismatched numbers. Contact Hoover customer support to validate suspicious items. Genuine parts are packaged securely and include warranty information. Be cautious of extremely low prices, as they may indicate counterfeit products. Authenticity ensures optimal performance and maintains your appliance’s warranty.
This concludes the Hoover Repair Manual. For additional support, visit the official Hoover website or contact their customer service for further assistance and genuine parts.
9.1 Final Tips for Successful Repairs
Always follow the manual’s instructions precisely and use genuine Hoover parts for optimal performance. Regularly inspect and maintain your appliance to prevent issues. Before starting repairs, ensure the vacuum is unplugged and wear protective gear. Refer to troubleshooting guides for common problems and reset your Hoover if necessary. Keep all screws and small parts organized during disassembly. Test the vacuum thoroughly after repairs to ensure functionality. For complex issues, consult professional assistance. By adhering to these tips, you’ll extend the life of your Hoover and maintain its efficiency. Remember to stay patient and methodical during the repair process for the best results.
9.2 Recommended Online Resources for Hoover Repairs
For additional support, visit ManualsOnline to download Hoover repair manuals and user guides. The official Hoover website offers detailed product information, troubleshooting guides, and genuine parts. YouTube channels dedicated to appliance repairs often feature Hoover-specific tutorials. Forums like RepairClinic and AppliancePartsPros provide valuable insights and solutions from experienced technicians. Refer to PDF manuals for models like A2145 001 and DDY062 80, available through trusted download sites. Always verify the authenticity of resources to ensure accuracy; Utilize these platforms to enhance your repair skills and access reliable information for maintaining your Hoover appliances effectively.